Back to Blog
Tutorial Laravel 12 — Building a Simple Todo List App
A step-by-step Laravel 12 tutorial that walks you through building a simple todo list app from scratch—models, migrations, routes, and Blade views in one focused pass.
Back
Backend

Table of contents
The fastest way to learn a framework is to build something real with it. A todo list is that project: small enough to finish in one sitting, big enough to touch migrations, Eloquent models, routes, controllers, and Blade views. This Laravel 12 todo list tutorial walks you through a simple CRUD app from scratch—no auth, no API. By the end you’ll have a running app and a clear picture of Laravel’s MVC flow.
What You’ll Build
A simple todo list app with:
- View all tasks
- Add new todos
- Mark complete / undo
- Delete todos
Prerequisites
You need PHP 8.2+, Composer, and Laravel 12 (or the current stable Laravel). A local database is required; SQLite is the fastest way to get going—no server setup. If you prefer MySQL or PostgreSQL, the steps are the same; only your .env and config differ. To check your PHP version, run php --version in the terminal.
- PHP 8.2+ (php.net — official docs)
- Composer (getcomposer.org)
- Laravel: install via the official Laravel installation guide (check the docs for your version, e.g. 11.x or 12.x)
Project Setup
Create a new Laravel application and point it at your database.
bash · Terminal
composer create-project laravel/laravel todo-app
cd todo-app
A fresh install already includes .env and an application key. You only need to configure the database. For SQLite, set DB_CONNECTION=sqlite in .env and create the database file if it doesn’t exist:
env · .env
DB_CONNECTION=sqlitebash · Terminal
touch database/database.sqliteA fresh install may have already run migrations for you. Either way, run php artisan migrate yourself so you see how it works (it creates the default tables, e.g. users):
bash · Terminal
php artisan migrateYou’re ready to add the todo feature.
Database: Migration and Model
Create a migration for the todos table and a Todo model.
bash · Terminal
php artisan make:model Todo -mThis creates two files: app/Models/Todo.php (the Todo model) and database/migrations/..._create_todos_table.php (the migration for the todos table). The -m flag tells Artisan to generate the migration together with the model.
Edit the migration (in database/migrations/..._create_todos_table.php). We add two columns: title (string, the task text) and completed (boolean, default false). Plus id and timestamps:
php · database/migrations/create_todos_table.php
Schema::create('todos', function (Blueprint $table) {
    $table->id();
    $table->string('title'); // the task text
    $table->boolean('completed')->default(false);  // done or not
    $table->timestamps();
});
Run the migration:
bash · Terminal
php artisan migrateIn app/Models/Todo.php, add two properties:
$fillable — Laravel blocks mass assignment by default (e.g. Todo::create(['title' => '...', 'completed' => false])). Listing title and completed here allows you to set them in one go from the request.
php · app/Models/Todo.php
protected $fillable = ['title', 'completed'];$casts — Tells Eloquent to turn the completed column (stored as 0/1 in the database) into a real PHP boolean when you read the model. In Blade you can then use @if($todo->completed) instead of checking for 1 or "1".
php · app/Models/Todo.php
protected $casts = [
    'completed' => 'boolean',
];
Routes and Controller
Create the controller first so the routes have something to point to:
bash · Terminal
php artisan make:controller TodoControllerThis creates app/Http/Controllers/TodoController.php. Then in routes/web.php, add the web routes:
php · routes/web.php
use Illuminate\Support\Facades\Route;
use App\Http\Controllers\TodoController;

Route::get('/', [TodoController::class, 'index'])->name('todos.index');
Route::post('/todos', [TodoController::class, 'store'])->name('todos.store');
Route::patch('/todos/{todo}', [TodoController::class, 'update'])->name('todos.update');
Route::delete('/todos/{todo}', [TodoController::class, 'destroy'])->name('todos.destroy');
Implement the four methods in TodoController:
At the top of the class, add use App\Models\Todo; and use Illuminate\Http\Request; if they're not there.
index — Shows the main todo list page. Fetches all todos from the database (newest first), then passes them to the view todos.index so Blade can render the list.
php · app/Http/Controllers/TodoController.php
public function index()
{
    $todos = Todo::orderBy('created_at', 'desc')->get();
    return view('todos.index', compact('todos'));
}
store — Creates a new todo. Validates the title input from the form, creates a new record in the todos table with completed = false, then redirects to the index page with a flash message.
php · app/Http/Controllers/TodoController.php
public function store(Request $request)
{
    $validated = $request->validate([
        'title' => ['required', 'string', 'max:255'],
    ]);
    Todo::create([
        'title' => $validated['title'],
        'completed' => false,
    ]);
    return redirect()->route('todos.index')->with('message', 'Todo added.');
}
update — Toggles the completed status. Receives one todo via route model binding, flips completed (true ↔ false), saves to the database, then redirects back with a message.
php · app/Http/Controllers/TodoController.php
public function update(Todo $todo)
{
    $todo->update(['completed' => !$todo->completed]);
    return redirect()->back()->with('message', 'Todo updated.');
}
destroy — Deletes one todo. Receives the todo via route model binding, deletes the record from the database, then redirects back with a message.
php · app/Http/Controllers/TodoController.php
public function destroy(Todo $todo)
{
    $todo->delete();
    return redirect()->back()->with('message', 'Todo deleted.');
}
Why view() vs redirect()? — index returns a view because the job is to show a page: you pass data ($todos) to a Blade template and Laravel sends back HTML. store, update, and destroy return a redirect because they change data (create/update/delete); after that you send the user to a URL (index or back) instead of rendering a new page.
Redirecting also avoids the browser re‑submitting the form when the user refreshes. The ->with('message', ...) puts a one-time flash message in the session so the next page can show “Todo added,” “Todo updated,” or “Todo deleted.”
In Blade, use route('todos.update', $todo) and route('todos.destroy', $todo) for the form actions; use @method('PATCH') or @method('DELETE') inside the form for non-GET requests.
Views with Blade
Create the layout file first, then the todo list view.
Step 1 — Create the layout
Create resources/views/layouts/app.blade.php (create the layouts folder if it doesn’t exist). This file wraps every page: a basic HTML shell with <head>, a container <div>, and @yield('content') where each page’s content will go. We use Tailwind CSS for styling—you can load it via the CDN script below, or install it with npm/Vite if you prefer; the layout and views in this tutorial use Tailwind utility classes.
html · resources/views/layouts/app.blade.php
<!DOCTYPE html>
<html lang="en">
  <head>
    <meta charset="UTF-8" />
    <meta name="viewport" content="width=device-width, initial-scale=1.0" />
    <title>@yield('title', 'Todo')</title>
    <script src="https://cdn.jsdelivr.net/npm/@tailwindcss/browser@4"></script>
    <style>
      /* Smooth, readable base */
      body {
        font-feature-settings:
          'kern' 1,
          'liga' 1;
      }
    </style>
  </head>

  <body class="min-h-screen bg-stone-50 font-sans text-stone-800 antialiased">
    @yield('content')
  </body>
</html>
Step 2 — Create the todo list view.
Create resources/views/todos/index.blade.php (create the todos folder if needed). You can use either version below: with Tailwind classes (styled) or without classes (plain HTML, good if you want to add your own CSS or none).
Option A — With Tailwind classes (styled):
With Tailwind classes (styled)
html · resources/views/todos/index.blade.php
@extends('layouts.app') @section('content')
<div class="min-h-screen bg-stone-50/80 px-4 py-16 sm:py-24">
  <div class="mx-auto max-w-md">
    <h1
      class="mb-12 text-center text-2xl font-normal tracking-tight text-stone-800"
    >
      Todo
    </h1>

    @if (session('message'))
    <p class="mb-6 text-center text-sm text-stone-500">
      {{ session('message') }}
    </p>
    @endif

    <form action="{{ route('todos.store') }}" method="POST" class="mb-10">
      @csrf
      <div
        class="border-b border-stone-300 focus-within:border-stone-600 transition-colors"
      >
        <input
          type="text"
          name="title"
          value="{{ old('title') }}"
          placeholder="What to do?"
          class="w-full bg-transparent py-3 text-stone-800 placeholder-stone-400 focus:outline-none @error('title') placeholder-red-400 @enderror"
          required
          autofocus
        />
      </div>
      @error('title')
      <p class="mt-1 text-xs text-red-600/90">{{ $message }}</p>
      @enderror
    </form>

    <ul class="border-t border-stone-200">
      @forelse ($todos as $todo)
      <li class="group flex items-center gap-4 border-b border-stone-100 py-4">
        <form
          action="{{ route('todos.update', $todo) }}"
          method="POST"
          class="flex-shrink-0"
        >
          @csrf @method('PATCH')
          <button
            type="submit"
            class="block focus:outline-none focus:ring-0"
            title="{{ $todo->completed ? 'Mark incomplete' : 'Mark complete' }}"
          >
            @if ($todo->completed)
            <span
              class="flex h-5 w-5 items-center justify-center rounded-full border border-stone-400 bg-stone-400 text-[10px] font-medium text-white"
              >✓</span
            >
            @else
            <span
              class="flex h-5 w-5 items-center justify-center rounded-full border border-stone-300 text-transparent hover:border-stone-500"
              >·</span
            >
            @endif
          </button>
        </form>
        <span
          class="min-w-0 flex-1 text-[15px] {{ $todo->completed ? 'text-stone-400 line-through' : 'text-stone-700' }}"
          >{{ $todo->title }}</span
        >
        <form
          action="{{ route('todos.destroy', $todo) }}"
          method="POST"
          class="flex-shrink-0 opacity-0 transition-opacity group-hover:opacity-100 focus-within:opacity-100"
          onsubmit="return confirm('Delete this todo?');"
        >
          @csrf @method('DELETE')
          <button
            type="submit"
            class="text-xs text-stone-400 hover:text-stone-600 focus:outline-none"
            title="Delete"
          >
            Remove
          </button>
        </form>
      </li>
      @empty
      <li
        class="border-b border-stone-100 py-12 text-center text-sm text-stone-400"
      >
        Nothing yet. Type above and press Enter.
      </li>
      @endforelse
    </ul>
  </div>
</div>
@endsection
Option B — Without classes (plain HTML):
Without classes (plain HTML)
html · resources/views/todos/index.blade.php
@extends('layouts.app') @section('content')
<div>
  <h1>Todo</h1>

  @if (session('message'))
  <p>{{ session('message') }}</p>
  @endif

  <form action="{{ route('todos.store') }}" method="POST">
    @csrf
    <input
      type="text"
      name="title"
      value="{{ old('title') }}"
      placeholder="What to do?"
      required
      autofocus
    />
    @error('title')
    <p>{{ $message }}</p>
    @enderror
  </form>

  <ul>
    @forelse ($todos as $todo)
    <li>
      <form
        action="{{ route('todos.update', $todo) }}"
        method="POST"
        style="display: inline;"
      >
        @csrf @method('PATCH')
        <button
          type="submit"
          title="{{ $todo->completed ? 'Mark incomplete' : 'Mark complete' }}"
        >
          @if ($todo->completed) ✓ @else ○ @endif
        </button>
      </form>
      <span
        style="{{ $todo->completed ? 'text-decoration: line-through;' : '' }}"
        >{{ $todo->title }}</span
      >
      <form
        action="{{ route('todos.destroy', $todo) }}"
        method="POST"
        style="display: inline;"
        onsubmit="return confirm('Delete this todo?');"
      >
        @csrf @method('DELETE')
        <button type="submit" title="Delete">Delete</button>
      </form>
    </li>
    @empty
    <li>Nothing yet. Add one above.</li>
    @endforelse
  </ul>
</div>
@endsection
Option B uses no CSS classes except minimal inline style for layout (inline forms) and strikethrough so completed todos are still visible. You can replace those with your own stylesheet or leave the browser default look.
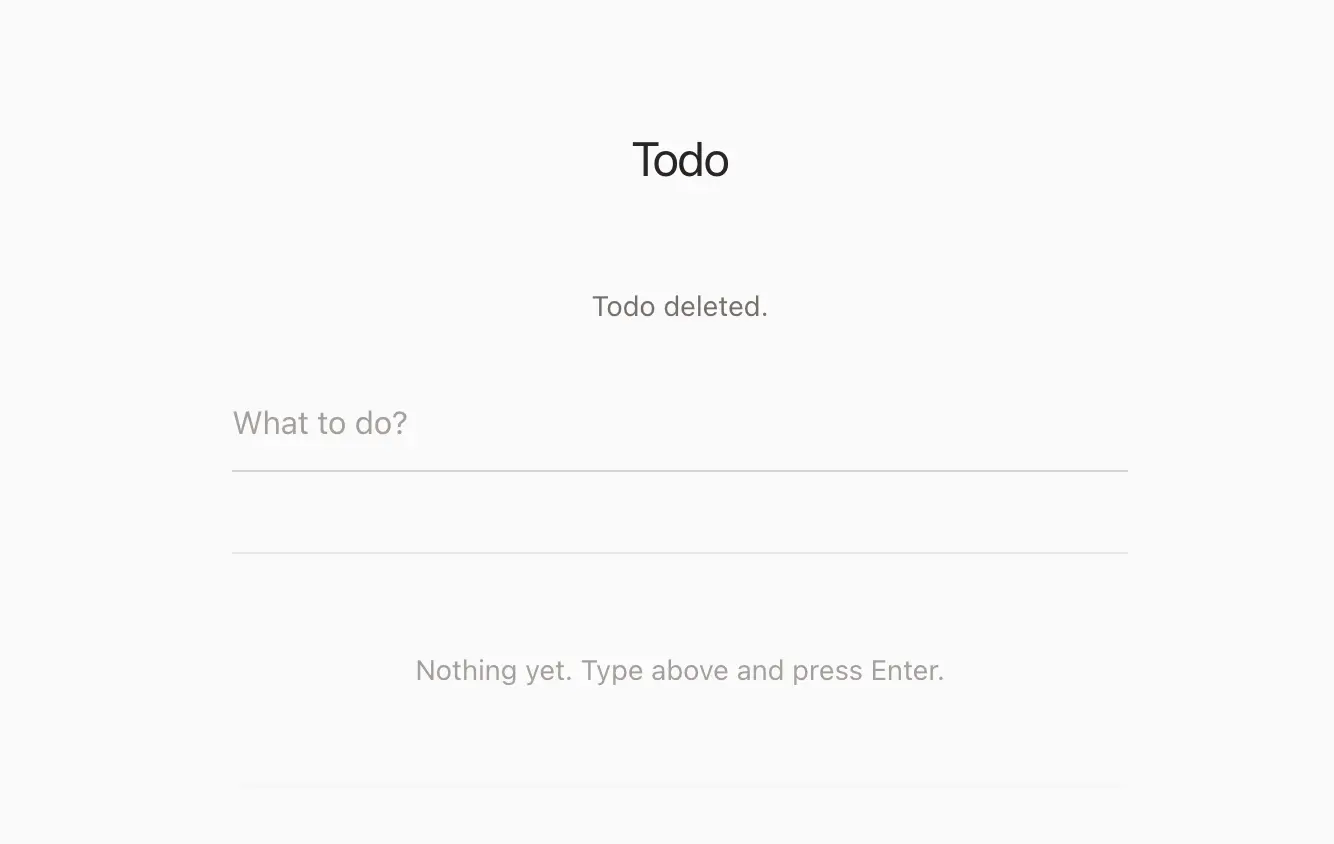
This view extends the layout, shows a flash message from session('message'), a form to add todos (POST to todos.store), and a list where each todo has a toggle (PATCH to todos.update) and a delete button (DELETE to todos.destroy) with a confirm dialog. No JavaScript is required beyond the optional delete confirm; plain forms and redirects handle the rest.
Step 3 — Test the app.
From the project root, run:
bash · Terminal
php artisan serveThen open http://localhost:8000 in your browser. Add a few todos, toggle them complete/incomplete, and delete one. You should see flash messages after each action. If anything errors, check that migrations have run (php artisan migrate) and that the layout and view files are in the paths above.
Wiring It Together
Request flow:
- GET / →
TodoController@index→ load all todos →todos.indexview. - POST /todos →
TodoController@store→ validate →Todo::create()→ redirect to index. - PATCH /todos/{id} →
TodoController@update→ togglecompleted→ redirect back. - DELETE /todos/{id} →
TodoController@destroy→$todo->delete()→ redirect back.
Laravel’s route model binding resolves {todo} to a Todo instance, so in update and destroy you receive $todo directly. If the id doesn’t exist, Laravel returns 404.
Run the app with php artisan serve, open the browser, add a few todos, toggle completion, and delete one. You’ve just used migrations, Eloquent, validation, Blade, and redirects—the core of a typical Laravel CRUD flow.
What You’ve Learned and Next Steps
You’ve set up a Laravel 12 app, added a migration and model, defined web routes, implemented a simple controller with validation, and rendered a todo list with Blade. That’s the same pattern you’ll use for larger features: model → migration → routes → controller → view.
From here you can add due dates, categories, or user ownership (e.g. tie todos to User). For production-style concerns—testing, deployment, and scaling—see Scaling Laravel Applications and Laravel Octane in Real Production for when and how to optimize.
References
- Laravel Documentation — Official docs (installation, Eloquent, Blade, validation). Use the version selector for 11.x or 12.x.
- Laravel Installation — Create new project, server requirements.
- Laravel Eloquent — Models, mass assignment, casting.
- Laravel Blade — Templates, layouts, directives.
- Laravel Validation — Request validation rules.
Comments
No comments yet
Loading comments...